Brussel Sprout, Burrata & Bacon Salad

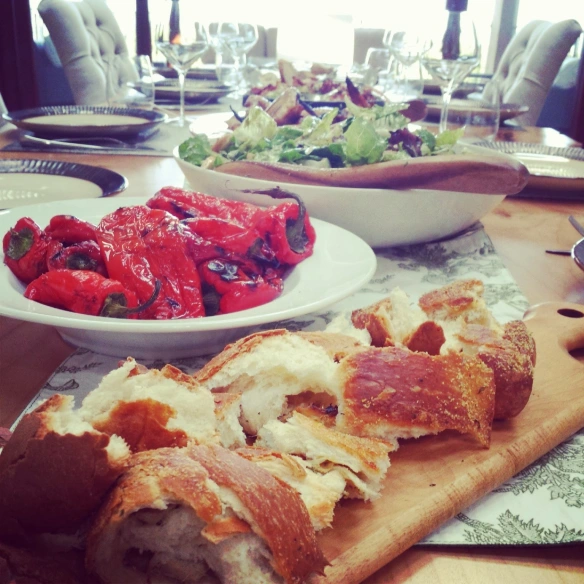
I made this amazingly fresh and satisfying salad for a friend’s birthday and I was unbelievably surprised how well the flavors of cheese, bacon, brussel sprouts, and the sweet and tart dressing balance each other out and are flat out delicious! My husband and I love brussel sprouts, but cooking them whole or halved can get boring and I was looking for a new way to eat these. A raw preparation was definitely not at the top of my mind since I’ve become so used to cooking them in my cast iron pan like my recipe of ‘Roasted Brussel Sprouts‘. However, I found so many burrata and brussel sprout salad recipes online and realized that for my taste, something major was missing – that was bacon!! Bacon makes everything better, yes. However, this salad REALLY is complete with the added salty-crispiness added by the cooked bacon.

Share this salad with your loved ones – if you are vegetarian, you can substitute the bacon for crispy tortilla chips (which you can buy from the supermarket as ready-to-go salad topper strips), or you can also add toasted sliced almonds for that extra crunch!

Love,
Priyanka

IMG_20131006_125832
Ingredients

10-15 slices of bacon
1 red onion, finely sliced
5 tablespoons good quality extra-virgin olive oil, divided, plus extra for drizzling
2 tablespoons balsamic vinegar
1 pound Brussels sprouts
1/2 cup Parmesan cheese shavings
2 tablespoons lemon juice, plus extra to taste
1 teaspoon honey
Kosher salt, to taste
freshly cracked black pepper, to taste
2 balls burrata cheese (or good buffalo mozzarella), room temperature

Directions

Heat a saut茅 pan over medium-high heat and add one tablespoon of olive oil. Add onions and cook until browned and beautifully caramelized (about 10 minutes, stirring occasionally).. Remove from pan and set aside in a bowl. Add balsamic vinegar and let it sit for 5-10 minutes to soak in the flavor.

In a separate pan, cook bacon until crispy (but not burnt). Set aside for later once cooked.

Meanwhile, wash the brussel sprouts and remove outer leaves. Trim off the bottom nubs with a knife and cut each brussel sprout in half. Using either a mandoline (careful not to cut your hand!) or with a sharp knife, cut the sprouts into paper thin strips. trim nubs and halve sprouts. Using a mandoline or sharp knife, cut sprouts paper-thin. (An awesome shortcut is to use the slicing insert on a food processor to skip this step and save yourself a lot of time!).

Transfer shaved leaves to a mixing bowl. Add onions and mix until evenly combined.

In small bowl, whisk together the remaining 3 tablespoons of olive oil, 2 tablespoons of lemon juice, 1 tablespoon of honey and salt and pepper, to taste. Taste the dressing and adjust honey/lemon juice/salt/pepper as needed to reach the balance you want. It’s ok if it’s a little salty and tart as it will even out when tossed with the sprouts.

Toss slaw with enough vinaigrette to moisten. Taste and adjust seasoning with extra salt, pepper and lemon juice as needed. Let sit at least 10 minutes so sprouts can absorb the flavors.

Put the marinated slaw in your serving bowl. Place burrata balls on the side in the serving bowl (so that your guests can take as much (or little) cheese as they want), and season the cheese lightly with salt and pepper and the last tablespoon of olive oil. Add in cooked, crispy bacon on top of the slaw.
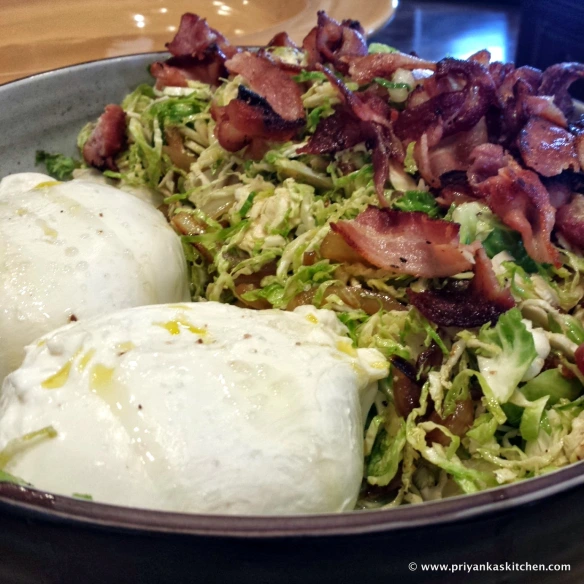
Enjoy along with the rest of your meal! 馃檪
IMG_20131006_131700

Dreamy Chicken Pot-Pie

IMG_20130930_004159

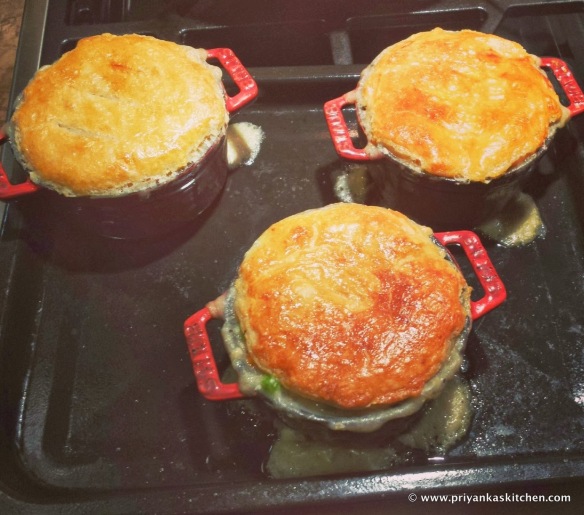
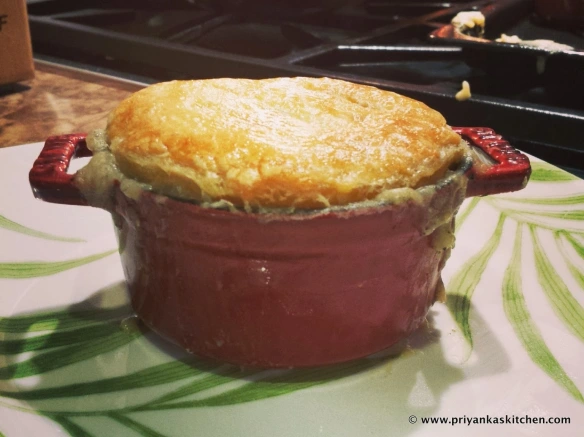
With winter approaching, my cravings always turn to hot, bubbly dishes. When I think winter, I immediately think pie – more specifically, POT PIE! This is a quintessential American recipe that defines comfort food for me (along with fried chicken and mashed potatoes). When I was testing this recipe, I used Ina Garten’s ever-famous recipe for chicken pot pie – why reinvent something that is already amazing? Although, I have to admit, I prefer my modifications that omit 30% of the butter, small pearl onions, and heavy whipping cream (only to be replaced by a beautiful, tangy yogurt cheese). I also added celery (I love the crunch that it brings!) and replaced the parsley with thyme since I believe the flavors are much better this way.

I cut down cooking time by more than half by using store-bought rotisserie chicken (if you can, buy organic – Whole Foods has beautiful rotisserie chicken – why should you add an hour of cooking time to this recipe to just oven-roast chicken?). I also believe that this pot pie lends itself beautifully to a puff pastry crust. You CAN (if you must) make your own pastry dough, but I prefer spending less time making this beautiful dish and more time EATING it 馃檪

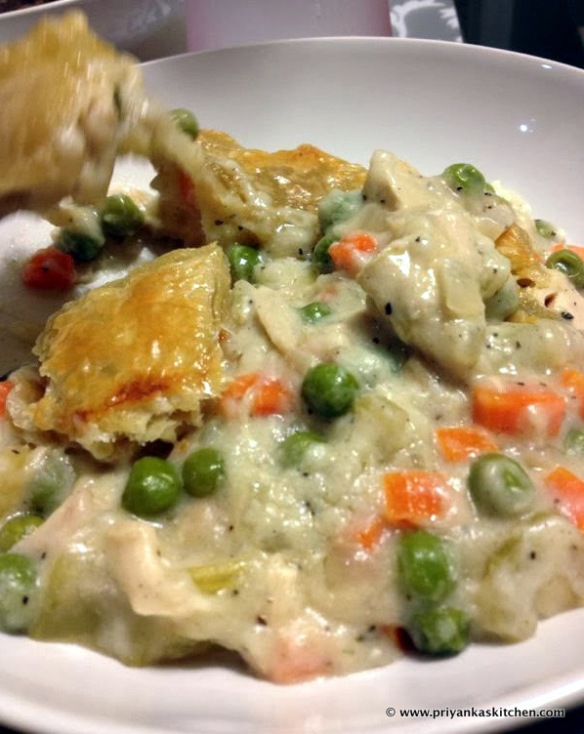
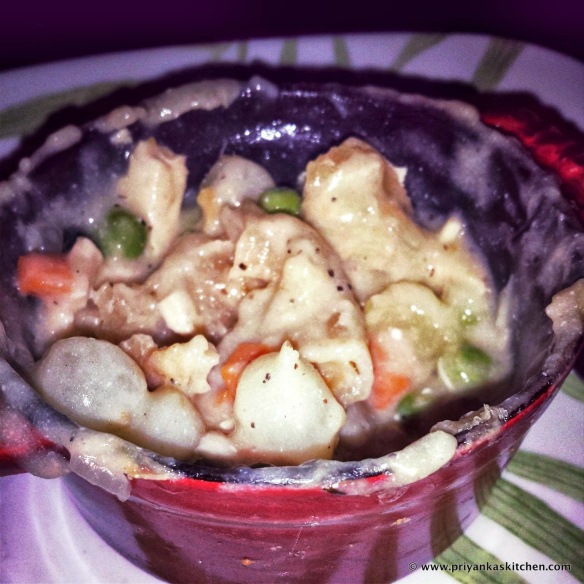
I really hope you enjoy this recipe, my loves! You can modify it serve a large group by baking this in a large serving dish that is oven proof and serving it casserole style – whatever your heart desires (see below picture on the look of your pot pie if you do it family-style!). You can also make this vegetarian by using vegetable broth and cutting the chicken out. Or use beef or lamb meat instead for a spin on this – it will always be delicious – I promise!

IMG-20131001-WA0002

Love,
Priyanka

IMG_20130930_004453

Yields: 8-10 servings
Ingredients
3 cups boneless chicken meat from store-bought rotisserie chicken
5 cups chicken stock
2 chicken bouillon cubes (or two teaspoons of powder chicken bouillon)
8 tablespoons (1 stick) unsalted butter, divided
2 cups yellow onions, finely diced
3/4 cup all-purpose flour
Kosher salt
Freshly ground black pepper
4 tablespoons labneh (strained yogurt cheese that is available at local Middle-Eastern markets). [You can substitute with 1/4 cup heavy whipping cream or sour cream.]
1 cup medium-diced carrots
1 cup diced celery
2 cups frozen peas
1 tablespoon thyme powder
puff pastry, store bought (in the frozen section)
1 egg beaten with 1 tablespoon water, for egg wash

Directions

Preheat the oven to 375 degrees F.

In a small saucepan, heat the chicken stock and dissolve the bouillon cubes in the stock.

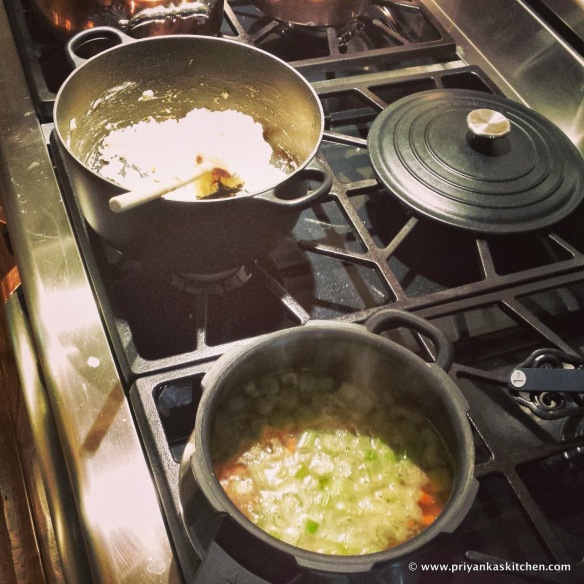
In a large pot or Dutch oven, melt the butter (half of the stick) and saute the onions over medium-low heat for 10 to 15 minutes, until lightly browned.

Once the onions are lightly browned, add the peas, carrots, and celery to the pot. Cook, stirring occasionally, until vegetables are tender (approximately 5 minutes). Add chicken broth to the pot and bring to a boil.

Meanwhile, in a separate pot, melt the remaining butter (the remaining 1/2 of the stick). Add the flour and cook over low heat, stirring constantly with a wooden spoon, for approximately 1-2 minutes until the flour cooks a little.

IMG_20130929_235919

Add all of the hot chicken stock and vegetables to the flour. Continue stirring the mixture over low heat for another minute or so until well-incorporated and thick. Add 2 teaspoons salt, 1 tablespoon freshly cracked black pepper, and labneh. Add the chicken and thyme. Stir well until well-incorporated. Taste and adjust seasonings according to taste.

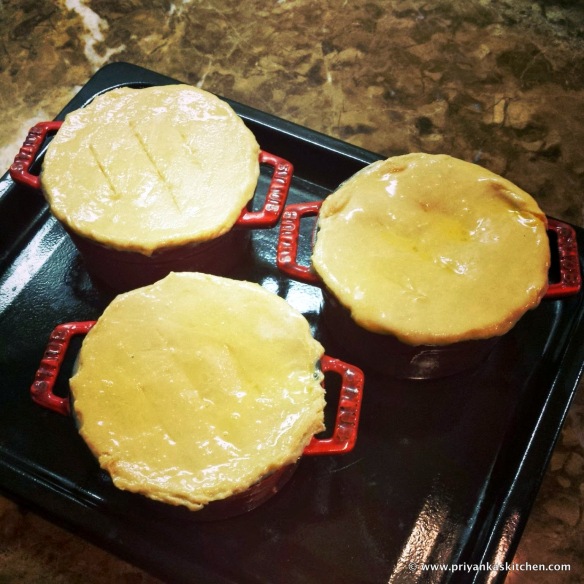
Divide the filling equally among ramekins (oven-proof). Brush the outside edge of each ramekin with the egg-wash (acts like glue), and cover each ramekin with a circle of puff-pastry that is a little larger than the opening. Using your fingers, seal the opening with the pastry by crimping the dough to folder over the side. Brush the dough with egg wash and make 3 slits in the top with a sharp knife.

IMG_20130930_002025

Place on a baking sheet and bake for approximately 25 minutes, turning once halfway through, until the top is golden brown and the filling is bubbling hot.

Serve hot and enjoy! 馃檪

IMG_20130930_004917

Almond-Crusted Halibut with Beurre Blanc

I have made this gorgeous dish many times when entertaining, and it has never, ever disappointed. In fact, I have to attest that every time I have made this dish, I always get asked for the recipe. This is definitely a special occasion recipe (both because of the decadence of the dish with the butter and heavy cream, but also because of the high cost of halibut!). If you are on a budget, on a diet, (or both) do not fret! You can replace the halibut with tilapia (less than half the cost), you can cut down the butter and replace with margarine or part oil, part butter, and you can replace the heavy cream with fat free half and half! The taste won’t be the same, but it will still be a delight. 馃檪

Please let me know if you try this out (take pictures please!!!) and I would love to hear your thoughts.

Love,
Priyanka

Almond Crusted Halibut PK

Ingredients

1/4 cup dry white wine
2.5 tablespoons cider vinegar (you can subsitute with apple cider vinegar if needed, although it has a stronger flavor)
1/4 cup minced shallots
1 tablespoon thyme
1 bay leaf
1/2 cup heavy cream
2/3 cup unsalted butter – chilled, cut into tablespoon-size pieces
4 tablespoons chopped fresh chives
2 tablespoons fresh lemon juice
Kosher salt and freshly cracked pepper to taste

4 (6 ounce) fillets of halibut
2 tablespoons extra virgin olive oil
3 tablespoons unsalted butter
4 tablespoons panko bread crumbs
1/4 cup sliced almonds
2 teaspoons unsalted butter, melted
1 egg, lightly beaten

Directions

Beurre blanc:
In a saucepan over medium-high heat, combine wine, vinegar, shallots, thyme and bay leaf. Boil until liquid has evaporated. Stir in the heavy cream, and boil until liquid is reduced by half. Decrease the heat to the lowest setting.

Whisk in the butter, 1 cube at a time, melting each one before adding another. Do not allow sauce to simmer (or it may separate). Once all of the butter has been melted in, strain the sauce into a glass bowl. Add in salt, pepper, chives and lemon juice. Keep this sauce warm by placing the bowl inside another glass bowl with hot water in it. This way the heat from the water will indirectly eep the beurre blanc warm.

Fish Preparation
Rinse the fish fillets, pat them dry, and season them with Kosher salt and pepper.

Heat oil and 1.5 tablespoon butter in a large skillet over medium-high heat. Do not let the butter burn! Cook the halibut fillets approximately 3 minutes on each side, or until lightly browned, and just cooked through (you don’t want to cook them all the way through). Transfer the filets to a baking sheet, and let them cool for approximately 5 minutes.

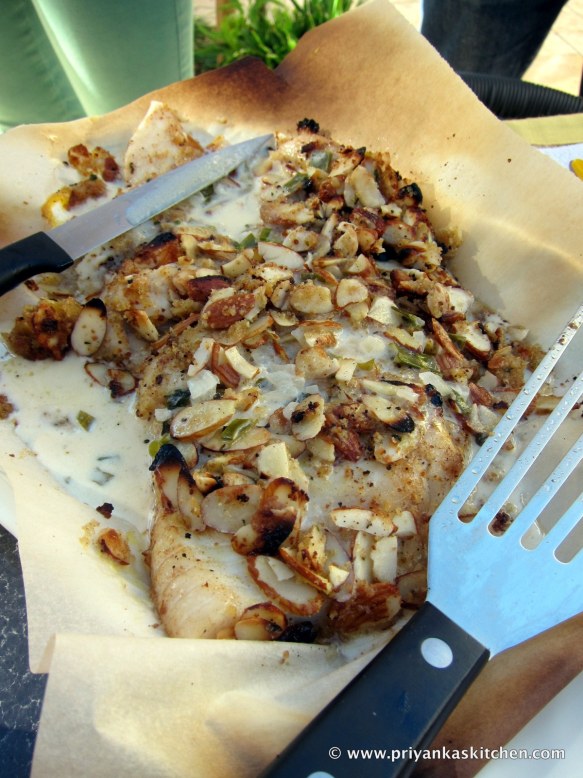
Meanwhile, in a small bowl, stir together the panko bread crumbs, almonds and 2 tablespoons of the melted butter. Brush the tops of fillets with egg, and spread with the almond mixture.

Finishing Touches
Broil the fillets 1 to 2 minutes, or until browned (watch closely because the difference between a perfectly cooked halibut and a burned halibut can be just a few, mere moments).

Place fillets on individual plates, and spoon beurre blanc (and lots of it!) on top of the fish and around it. Serve immediately (and enjoy immensely!).

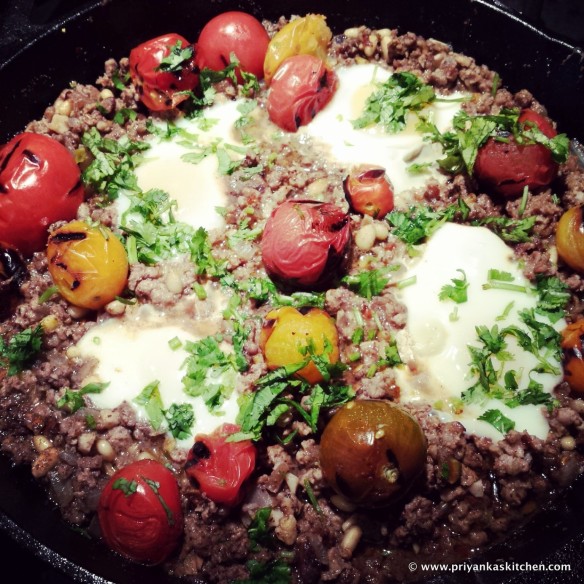
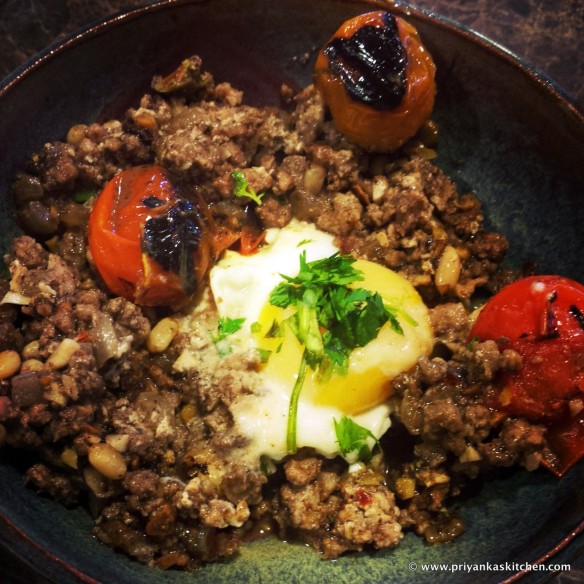
Braised Eggs with Lamb, Tahini & Mixed Nuts

I love runny eggs, and goodness, do I love my ground lamb. Add some nuts and harissa into it, and it becomes a knock-out combination. I stumbled upon this recipe in a lovely book called ‘Jerusalem‘ by Yotam Ottolenghi and Sami Tamimi. This recipe is on the cover of the book, and to be honest, I saw the picture, my mouth started watering, and I bought the book :).

I made a few modifications – preserved lemon is not easy to come by, and I couldn’t imagine this dish without some fresh lemon juice cooked into the meat, as well as pine-nuts! Lamb and pine nuts are such a beautiful combination because they add a subtle crunch to the lamb without overpowering the meat.

This is a gorgeous, one-pot meal with the spice of the harissa, mixed with the crunchy nuts, oozing egg, and delicious sumac and citrus shining through the dish. This makes a perfect meal when paired with a bold glass of red wine (like a cabernet sauvignon) and some great company. Enjoy!!

PS – If you want to pair it with another dish, make a fresh and light cous cous to go with it! 馃檪

Love,
Priyanka

Lamb and Egg Pan Shot PK

Lamb and Egg w Wine Glass PK

Ingredients

1 tablespoon extra-virgin olive oil
1 large onion, finely chopped
12 cloves of garlic, finely chopped
1 pound ground lamb
2 teaspoons sumac, plus a little extra for garnish
1.5 teaspoons ground cumin
1/4 cup of crushed, toasted, unsalted pistachios
1/4 cup of toasted, unsalted pine nuts (or pignolias)
2 teaspoons harissa
2 teaspoons fresh lemon juice
1 cup cherry tomatoes
1/2 cup organic chicken stock
4 large, organic eggs
Kosher salt, to taste
freshly cracked black pepper, to taste
Garnish: sumac, cilantro, parsley

Yogurt Sauce
1/2 cup greek yogurt
1.5 tablespoons tahini paste
1 tablespoons fresh lemon juice
1 tablespoon water

Directions

Heat the olive oil over medium-high heat in a cast-iron pan that you have a tight-fitting lid for (pan 1). Meanwhile, place a second cast-iron pan over high heat for a different use (pan 2).

Step 1: In pan 1 (over medium-high heat with olive oil), saute茅 the onion and garlic, stirring occasionally with a wooden spoon for 5-6 minutes until lightly browned. Now, turn the heat up to high and add the ground lamb, browning for an additional 5-6 minutes, stirring with your wooden spoon occasionally. Add the lemon juice, sumac, cumin, 1 teaspoon Kosher salt, black pepper, and stir until well-incorporated. Remove the pan from heat and mix in the nuts, harissa. Set aside.

Step 2: While the onion and garlic are cooking, add the cherry tomatoes to pan 2 which has been pre-heated (note: it is too hot if it is smoking!). Char them for 4-6 minutes, turning them ocassionally, until slightly blackened and blistered on the outside. Remove the tomatoes from the pan and set aside.

Step 3: Prepare the yogurt sauce by adding all the sauce ingredients to a bowl, mixing with a fork until well-incorporated. It should be the consistency of thick yogurt – feel free to add a few teaspoons of water until you’ve reached the consistency you desire.

Steps 1, 2 and 3 can be pre-prepared up to one-hour in advance. When ready to serve, add the chicken stock to the pan with the meat, spices, and nuts and bring to a boil. Once boiling, lower the heat to low. Make 4 wells in the mix and break an egg into each well so that it doesn’t spread and is contained in the well you have created. Cover the pan with the tight-fitting lid and cook over low heat for approximately 3-4 minutes.

Please the charred tomatoes on top of the meat mixture, avoiding the eggs (so you don’t rupture the egg yolks), and cover again, steaming for an additional 5 minutes. (You want the egg whites to be cooked, but the yellow part should be runny).

Remove from heat, dollop with the yogurt sauce as liberally as you want, sprinkle with sumac, and garnish with either freshly chopped cilantro or parsley. Serve hot and serve the extra yogurt sauce alongside since this dish can dry out and needs that moisture.

Enjoy! 馃檪

Lamb and Egg Single Serving PK

‘High Tea’ Cucumber-Chutney Sandwiches

I grew up eating these delicious, light, fluffy sandwiches. My fondest memories of my summer days when I was in school include going for a rigorous swim, after which my mom would whip up these sandwiches for a light snack. These are often served in homes in India, and my guess is that this was India’s version of the British ‘tea sandwiches’. In India, they slather on butter instead of cream cheese, but I prefer the lightness (and lower calories) of using a light whipped cream cheese.

If you are making these for a party and want a sleek presentation, cut off the ends of the bread slices before cutting them into thirds for bite-sized sandwiches. When making these at home, I prefer not wasting the ends of the bread, and quite frankly, I love the rustic look! 馃檪

Enjoy this airy (and deliciously vegetarian) recipe from my childhood days. Share them with your kids, family, and friends and pair it with a delicious cup of cardamom tea to feel like royalty and have high tea! 馃槈

Love,
Priyanka

Cucumber and Chutney Sandwiches PK
Yields: 1 beautiful sandwich
Ingredients
2 slices of white or buttermilk bread (or any other bread you enjoy)
1 tablespoon of light, whipped cream cheese
2-3 tablespoons of cilantro-mint chutney
1/4 cucumber, thinly sliced into disks
salt, to taste
black pepper, to taste
Fun idea: Stuff these sandwiches with some crispy chips like doritos for an added crunch!

Directions
Spread the cream cheese on one slice of bread. Now lightly salt and pepper this piece of bread. Now spread the chutney over the cream cheese (this minimizes the bread getting soggy from the chutney). Now arrange the slices of cucumber on top of either side (you can add less or more cucumber according to taste).

Serve immediately and enjoy!

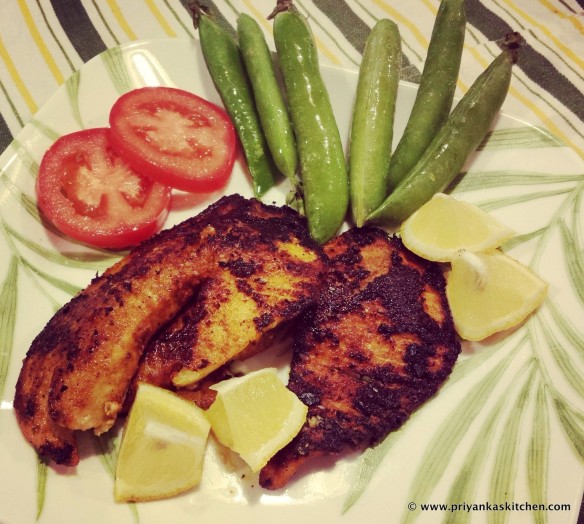
Spicy & Crispy Indian Fish

A dear family friend of ours is an AMAZING cook and she recently made her specialty fish dish for my mom when she was recently unwell. This is my attempt to recreate it from what I remember, but this is an adaptation since I have added coriander powder and tested my own variation on how much of each ingredient goes into the paste. My favorite part of this dish is the crispy exterior and succulent interior combined with the spicy, garlic paste that the fish is coated with.

Pair this with rice, bread, tortilla, or eat it by itself withs one veggies for an absolutely gorgeous weeknight (or weekend!) meal. 馃檪

Enjoy!

Love,
Priyanka

IMG_20130722_232310
Ingredients

6 white fish filets of your choice (tilapia works really well as it is flat and crisps beautifully!), but you can use other fish
1 teaspoon Kosher salt
1 teaspoon turmeric
1.5 teaspoon red chili powder (you can reduce or increase this based on your spice preference or to make it more kid-friendly)
6 cloves garlic
1 teaspoon of ginger paste (or finely minced ginger)
2 tablespoons vegetable oil
the juice of one lemon (or 1 tablespoon of lemon juice)
Optional garnish ideas: fresh cucumber, red onion, avocado

Directions

In a blender, pure茅 all of the marinade ingredients until well-incorporated. Using gloves (to avoid smelling like fish as well as saving yourself from the hot chili powder), spread the marinade paste all over both sides of the fish filets. If you have a few minutes to spare, let them sit in the marinade for 15-20 minutes. Meanwhile, heat up your skillet over medium-high heat.

Once the skillet is hot, turn down the heat a notch and add the filets.

Cook for approximately 4-5 minutes (depending on the thickness of the fish you are using), undisturbed so you get a nice crispy crust. Flip the fish and cook the filets until cooked to your liking.

[Note: when I am using tilapia, I cook the first side for about 4 minutes, and the other side for approximately 3 minutes for a total of 7 minutes.] Plate the fish, sprinkle it with Kosher salt, drizzle fresh lemon juice on it, and enjoy fresh & hot! 馃檪

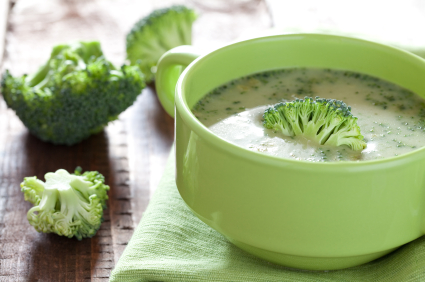
Cheesy & Creamy Broccoli Soup

This is the quintessential, classic green vegetable soup that we all grew up on in America. Our parents ‘conned’ us into eating green veggies with this soup, but perhaps we conned them into enjoying such a luscious and creamy and cheesy treat! 馃槈 My soup craze continues, and I hope you enjoy this simple yet delicious recipe that you can share with both your young and adult friends!

Love,
Priyanka

Yields approximately 6 servings
Broccoli Soup PK
Ingredients
2 tablespoons butter
1 onion, chopped
2 stalks celery, chopped
2 cups chicken broth (can use vegetable broth to make it vegetarian!)
6 cups broccoli florets, steamed
3 tablespoons butter
2 cups heavy whipping cream (or milk, for a lighter version)
3/4 cup of shredded cheddar cheese
Kosher salt and ground black pepper, to taste

Directions

Melt 2 tablespoons butter in medium sized stock pot, and saute onion and celery until tender.

Add broccoli and broth, cover and simmer for 10 minutes.

Put all the ingredients in a blender (don’t fill the blender pitcher more than halfway full and be sure to hold down the lid of the blender with a folded kitchen towel). Carefully start the blender, pulsing first, then leaving it on the ‘liquefy’ or ‘puree’ setting for about 30 seconds-1 minute (depending on the strength of your blender).

Note: If you do not own a blender, you can use a stick blender and puree the soup right in the cooking pot.

Pour blended soup back into a saucepan, add cheese, and simmer for approximately 10 minutes on low-medium heat. Season with Kosher salt and black pepper, according to taste. And serve hot with a crouton garnish! Enjoy 馃檪

Easy Butter Chicken

It’s amusing how when people find out I’m an avid cook and have a food blog, they naturally assume that my blog features Indian recipes (if not 100%, at least a majority of the recipes). And if you’ve been reading my blog, you know that I’m almost doing the opposite! I’ve been sharing mostly non-Indian recipes with a few, fun, and homey Indian recipes here and there. But, when I ask people what their all-time favorite Indian dish is, the majority exclaim ‘BUTTER CHICKEN’!! No kidding, I would probably say the same thing, although you and I both know that butter chicken is not the healthiest of Indian recipes. However, for the occasional time that you want to indulge in some authentic, North-Indian cuisine, this is an amazing, EASY recipe for butter chicken! Don’t remember to pair it with simple basmati rice for an explosion of flavors!

PS – I have previously blogged my recipe for Priyanka’s Butter Chicken, but this one is more authentic (no spinach in this one!) 馃檪

Enjoy 馃檪

Easy Butter Chicken PK

Yields: 6-8 servings
Ingredients
3/4 cup butter, divided
2 onions, minced
1 tablespoon minced garlic
1 (approximately 25 ounce) can of tomato sauce (or peeled and diced tomatoes)
2 cups heavy cream
2 teaspoons Kosher salt, plus more to taste
1 teaspoon cayenne pepper
1.5 teaspoon garam masala
2 tablespoons tandoori masala
1.5 pounds skinless, boneless chicken breast or thigh, cut into bite-sized pieces

Directions

Melt a few tablespoons of butter into a saucepan over medium heat (be careful to not burn the butter!). Stir in the onion and garlic, and cook slowly until the onion caramelizes to a dark brown for about 15 minutes, stirring occasionally. Melt the remaining butter, and once melted, add the garam masala, tandoori masala, and cayenne pepper and cook, stirring for about 30 seconds to 1 minute.

Now, add the tomato sauce, heavy cream, salt. Bring to a simmer, then reduce heat to lowest setting on your stove; cover, and simmer for 10 minutes, stirring occasionally. Then, add the cubed chicken into the sauce and continue to simmer for an additional 25 minutes on low heat.

Once you have checked the chicken has been cooked through, garnish with fresh cilantro and serve hot alongside Indian bread and hot basmati rice. Enjoy! 馃檪

Quick Padr贸n Peppers

Padr贸n peppers (also known as Spanish pimientos de Padr贸n), are my favorite kind of green peppers because they are crispy, mild-tasting, and occasionally give you a spicy surprise! These beautiful peppers come from the ‘capsicum’ family (better known as bell pepper in the US), and this preparation is my favorite way to eat them (and they are my husband’s favorite healthy snack!). Rumor has it that the peppers grown towards August/September tend to contain more capsaicin (spiciness) than the ones of June/July.

All I know is that when spring and summer comes around, I go hunting at local farmer’s markets for these gorgeous peppers. If any of you have kids, let it be known that I fed these to my 8-year-old nephew who was visiting from India, and he LOVED them. His mom claims that he usually doesn’t eat vegetables, so moms out there, maybe this is your answer to getting your kids to eat some greens.

Enjoy! 馃檪

Love,
Priyanka

Padr贸n Peppers PK

Ingredients
2 cups of raw padron peppers, washed and dried
1 tablespoon extra virgin olive-oil
Kosher salt, to taste
freshly cracked black pepper, to taste
fresh lemon juice

Directions
Heat a skillet over medium-high heat. Add extra-virgin olive oil and add padr贸n peppers. Sprinkle with the salt, pepper, and lemon juice and cook for approximately 5 minutes, stirring every other minute. You want to let the peppers blister a little, so don’t worry if some sides are blackened (that’s when they are most delicious!).

Take them off the heat, sprinkle with more salt, if desired, and enjoy hot! Note: Don’t eat the stems, but use them to hold the hot peppers while you eat 馃檪 Enjoy! 馃檪

Beet Salad with Yogurt

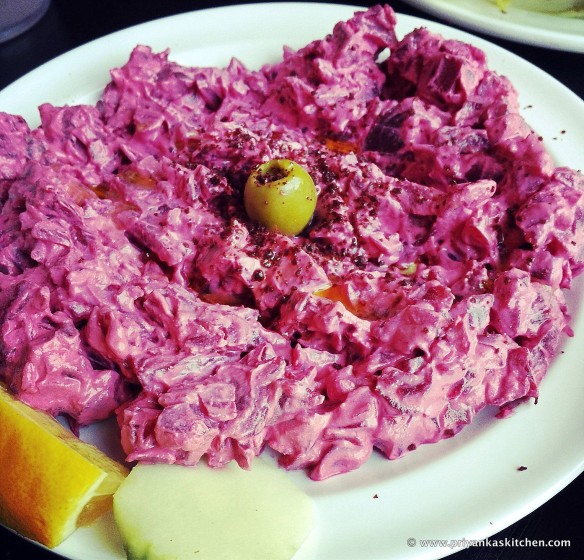
The experts say beets are a superfood, and greek yogurt is supposed to be good for you too – so what better than a creative salad that is creamy, tangy, robust in flavor, yet easy on your waistline? This is a Middle-Eastern recipe that I have had at an Iraqi restaurant. I fell in love with this dish so much, that I had to recreate it and I LOVE this salad! For me, this is a great one-bowl meal that works as a great lunch at your desk. However, This is also a great side-dish to kebabs, hummus, or anything else that has a middle-eastern touch 馃槈

The hardest part of the recipe is getting the beets cooked, so a quick cheat on this is to go to a store like Trader Joe’s and buy their packaged, pre-cooked red beet (can be found in their refrigerated section near their cut vegetables). Or, you can take the longer route if you have the time!

Enjoy this recipe, my loves. And enjoy the health benefits, while treating your stomach to deliciousness!

Love,
Priyanka

Red Beet Salad with Mint PK
Yields: 4 servings
Ingredients

1 teaspoon Kosher salt, plus more to taste
3 red beets, washed and leaves removed (or you can use pre-cooked beets that are available at many grocery stores)
1/2 cup Greek yogurt (e.g. Fage or Chobani works great!)
1 garlic clove, finely chopped
the juice of one lemon (or one tablespoon of lemon juice)
Fresh-ground pepper, to taste
Optional garnishes: sumac, lemon wedges, cucumber slices, pitted olives

Directions

Bring a large pot to a boil over high heat. Add a teaspoon of Kosher salt once it is boiling. Add the whole beets and boil on medium-high heat for about 30 minutes, until fork tender (not mushy!). Tender, yet firm is the perfect consistency for these cooked beets.

Meanwhile, fill a large bowl with ice and water; set aside.

When the beets are cooked, drain them and, while still hot, slip off their skins (if you are afraid of staining your hands, wear disposable gloves during this step!).

Place peeled beets in the ice water bath for 10 minutes. Drain and dry the beets. Chop the peeled and cooked beets into small, bite-sized cubes.

Add the yogurt, garlic, lemon juice, and a pinch Kosher salt and pepper.

Mix gently with your glove-covered hands (or two spoons) until the mixture turns a fuchsia color. For a creamier salad, add more yogurt. Transfer to a serving bowl. Top with sumac, serve with a lemon wedge and garnish with cucumber slices and pitted olives for an extra bite, if desired. Enjoy! 馃檪

Can be kept in the refrigerator for one day.